31 January 2012

Evolution of a Chili


I learn how to do things from books. I'm old-fashioned that way. I'll turn to the world wide webiverse if I'm desperate, but it's really not my preferred medium to learn the basics of any skill. I hate wading through blurry photos and chatty videos.

I learned how to cook from books. There's one book I think of in particular, a vegetarian cookbook I had in college, that was my gateway to quiches and Vichyssoise. But I have a special place in my heart for the chili recipe. It was made with pantry ingredients - cans of tomatoes and beans and lots of spices (sorry, Texans - this chili most definitely has beans). It fed us all in college time and again. And it's still feeding us now.


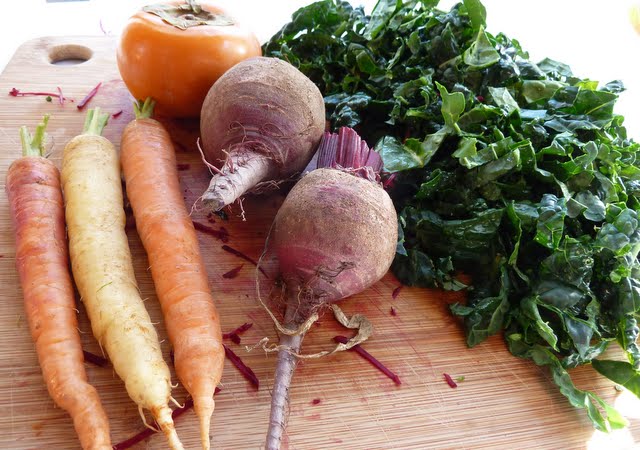
But oh, how it's changed. Gone are the store-bought cans, replaced by dried heirloom beans and home-canned tomatoes. Now I head out to the porch to pick some hot peppers and dig into the freezer to raid my stash of bell peppers from the summer. Somewhere along the way I began adding a dash of cinnamon. When I started eating meat again, that creeped its way in too. The spice variety slowly grew in number and maybe a little bit fancier.

In a way, this dish is a reflection of how my cooking philosophy has changed - as I evolved as a cook, so did this chili. (The evolutionary biologist in me is screaming that populations evolve, not individuals, but you'll forgive me for the colloquial usage.) It's gone from grocery store ingredients to farmer's market finds, from opening cans to culling from my own garden, and from simple to more complex, with a focus on finding the best ingredients for each component. Each time I make this dish, it's a culinary trip down memory lane.


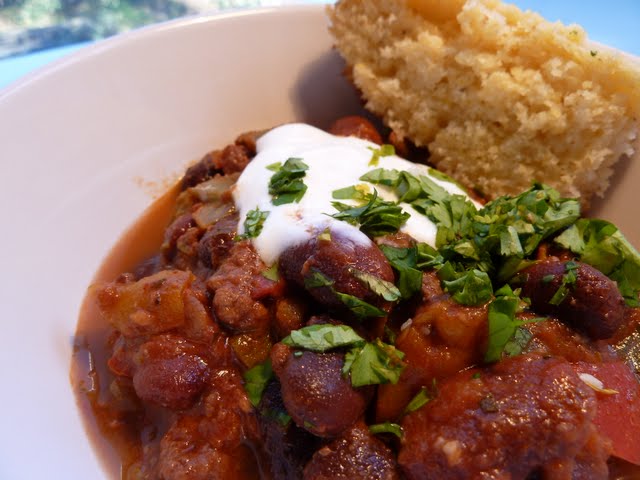
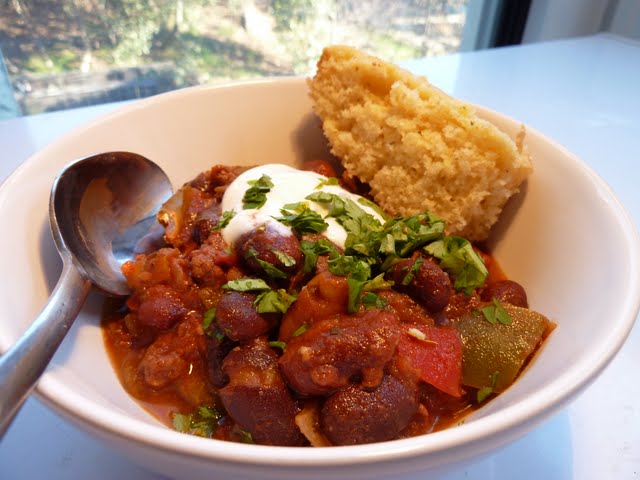
In its current incarnation, this quintessentially winter dish manages to capture the flavors of summer - San Marzano tomatoes and flowery bell peppers. I like to throw in the biggest heirloom bean I can find - this last batch used Ayocote Morados from Rancho Gordo - you can't go wrong with any of their beans. The multitude of spices gives this chili deep, complex flavors. I think it's worth hunting down each one, and enjoy the orchestration of pulling out all the required spices and adding them by eye and taste, but of course feel free to simplify, as befits your own tastes and spice cabinet. Add to this all the fun toppings that often accompany chili (I love any dish that has lots of potential garnishes!), and you've got a chili bar - just in time for the Superbowl.


Chili
Serves 6

5-6 cups of cooked or mostly cooked black beans, Pinto beans, Heirloom beans or a mix, cooking liquid
reserved (¾ - 1 pound of dried beans, or 3-4 14-oz cans of cooked beans)
1 pound of ground beef or turkey (optional)
2 cups chopped onions (about 1 large onion)
1 ½ tablespoons minced garlic (about 5-6 medium cloves)
1-2 hot peppers, diced, such as Jalapeños or Serranos
4 cups chopped bell peppers (green is fine, but a mix of green, red, and yellow is better)
1 quart or 1 28-oz can of whole or diced tomatoes
1 tablespoon tomato paste (optional)
¼ cup chili powder (I recommend you use some actual ground chilis, not just the chili powder mix)
1 teaspoon paprika
1 teaspoon smoked paprika (best quality you can find)
1 teaspoon ground cumin
1 teaspoon dried oregano
1 teaspoon ground garlic
1 ½ teaspoons salt
⅛ teaspoon cinnamon
1 teaspoon cayenne pepper
1 tablespoon red pepper flakes, or to taste

Suggested garnishes and sides:
Chopped cilantro
Sliced green onion
Shredded Cheddar or Monterey Jack cheese
Sour cream or yogurt
Sliced avocado
Corn bread
Tortilla chips
Spaghetti

·         Mix the spices together in a small bowl and set aside.
·         Brown ground beef or turkey in a large pot, if using. Drain fat and set aside.
·         Reheat the same pot, then add a tablespoon of oil. Add onions and sauté until translucent, about 2 minutes. Add garlic and hot peppers and continue cooking, 1 minute more. Add bell peppers and cook, stirring, 2 minutes more.
·         Add spice mixture and cook, stirring, about 1 minute.  Add tomatoes, beans and their liquid, and ground meat. Taste and make any initial seasoning adjustments. Add up to 1 cup of water if mixture is too thick, or up to 1 tablespoon of the tomato paste if mixture is too thin.
·         Let the mixture cook down until it thickens to desired consistency, at least 30 minutes to 1 hour. Taste again and adjust seasonings.
·         Serve with garnishes. This chili keeps well, and is even better the next day. It also freezes well.


*I've tried to give you lots of options here, so you can modify this recipe to your preference. In general, I like lots of ingredients, which when properly balanced can lend a nice complexity to any dish. This chili is very bean-heavy, and I recommend using the full one pound of dried beans if you're making this vegetarian.

18 January 2012

The Hundred Hour Salad


This is the story of  a salad with not-so-humble beginnings. It started one fall when a then-housemate and I were commiserating about how we were sick of the standard Caesar and Beet-Soft Cheese-Candied Nut salads that were populating restaurant menus. Why couldn't we create a dish that had all the components of a great salad, and really tasted like vegetables?

We knew we wanted greens, roasted root veggies, fruit, nuts, and cheese. We rooted through our fridge and came up with kale, beets, sweet potatoes, turnips, brussel sprouts, persimmons, pine nuts, and Parmesan cheese. We set about prepping the veggies and roasting them. I infused an olive oil with rosemary and garlic for the dressing. My friend thought to roast the kale and make them into chips. When it all came together, we had a gigantic roasted veggie salad that was bursting with fall flavors.

We ate it all winter. We made it for Thanksgiving, where it garnered its infamous name after my sister watched agog as we prepared the salad. Just washing, peeling, and chopping the veggies alone took quite some time and labor. My housemate, who is much more meticulous than I am, roasted each vegetable separately, to ensure that the roasting time on each was perfect. My sister was watching my housemate individually grab each kale leaf and dunk it ceremoniously into a large bowl of water to wash it. "What is she doing, baptizing each leaf?!?" my sister whispered to me, horrified. Pretty soon we were all referring to it as "The Hundred Hour Salad."

The salad was an entity, and it kept growing. The medley of vegetables in it was variable, but the number of components seemed to grow with each iteration, as did the time it took to prepare the dish. By the next Thanksgiving, it had been dubbed "The Thousand Hour Salad."

Clearly, the salad had gotten a little out of control. It was also starting to feel too heavy, with so many roasted components. Then I started seeing different versions of a raw kale salad. It's a very simple thing - raw kale with a garlicky, lemony dressing. This was the type of salad I could make regularly on weeknights, which our salad clearly was not.


I tried my hand at combining the best of both worlds, and that's how this salad came to be. It's a raw, pared-down version of the previous incarnation. It is honestly good with just kale and shredded beets, but delicious with a couple of other components, for added complexity. The kale and beets are marinated in the dressing, which softens them up and makes them more palatable to those who are scared of eating them raw.  We'll see what this salad looks like in a few years, because I'm pretty sure I'll still be making some version of it, but for now, I'm pretty happy with where it is. I hope you like it too.


Raw Kale-Beet Salad (formerly The Hundred Hour Salad)

Basics for the salad:
1 large bunch of Lacinato/Dinosaur kale, washed and cut into ribbons
2 medium beets, peeled and shredded
2 carrots, peeled and sliced thin lengthwise
1 Fuyu persimmon, thinly sliced
½ cup pecans, pine nuts, or walnuts
Parmesan cheese, grated

Optional ingredients:
watermelon radish, sliced thin
other winter greens, like escarole
spicy greens, like arugula or pepper cress
croutons, or stale bread, toasted in a pan with some garlic, salt, and pepper
pomegranate seeds

For the dressing:
¼ cup extra virgin olive oil, bonus if you infuse it with rosemary and garlic
 cup lemon juice, freshly squeezed (about half a lemon)
2 teaspoons minced garlic (2-3 medium cloves)
Salt and black pepper

·         Prep the kale and beets first by washing, peeling, and cutting as directed above.
·         Make the dressing by  adding the lemon juice to a bowl, then slowly whisking in the olive oil. Add the minced garlic, ½ teaspoon Kosher salt, and a few grinds of black pepper. Taste and adjust seasonings.
·        Combine a generous amount of the dressing with the kale and beets. (You can keep the beets separate if you are concerned about their color bleeding into the rest of the salad.) Let sit for 20-30 minutes to soften.
·         While marinating, prep the rest of the ingredients. Add to the beet-kale mixture. Toss and add more dressing if necessary.

11 January 2012

Back to Basics

January is a good time to get back to basics, especially in the kitchen after the holidays. Winter has settled in (at least for those of us in the Northern Hemisphere), and getting up when it's dark and cold outside can be a difficult task. Having a piping hot breakfast to look forward to makes winter mornings just a little bit easier.

This is the time of year when I inevitably turn to steel-cut oats as my breakfast of choice. I'm a savory breakfast eater, so my steel-cut oats usually involve salt, pepper, dinner leftovers, and a drizzle of olive oil. I love a dish that utilizes leftover vegetables, meat, or stock. An added bonus is that it makes my bowl of oats different every time, so I never get tired of it. And any dish that makes it easy to have some vegetables for breakfast is a win in my book.

I often make a week's worth of oatmeal ahead of time and keep it in the fridge for the rest of the week, helping myself to a serving every morning. It's easy to take to school and heat up in the microwave. It seems to get creamier the longer it sits. But there's something about the ritual of making it that is great for those mornings that are a little less rushed.


I usually start out by melting a pat of butter in a pot with plenty of room for bubbling oatmeal. I then add my oats and let them toast for a little bit, until they smell nutty. In the meantime, I boil water in the electric kettle for both the oatmeal and either tea or coffee. Then I add the boiling water and any other stock/wine/non-dairy liquid I want to use up. Next go in the chopped veggies and/or meats. I let the oatmeal simmer for 10-15 minutes, until it reaches the consistency I want. I often add extra water if it starts getting dry. At the end, I'll add the final touches - salt, pepper, olive oil, maybe some salad greens. Some days I cook an over-medium egg and throw it on top for extra-heartiness.


This particular morning, I added a bit of leftover dashi I had from making a Korean soup/broth the night before. A little umami always makes everything better. I also threw in some butternut squash and a handful of beet greens, which added a nice orange-pink tint and made me happy. Add a bowl of extra-spicy chai tea (drinking out of a bowl always makes me feel French) and some wedges of Farmer's market oranges, and it doesn't get any better.


So here's to a brand new year. I hope you join me for posts about good food and good cooking, and the magic that can happen when you share those things with people you love. Cheers!


Steel Cut Oats
Serves 2

pat of butter
1/2 cup steel cut oats
2-3 cups of cooking liquid (any combination of stock or water)
1/4 - 1/2 cup of leftover vegetables or meat
olive oil

·         Melt pat of butter in a medium pot.
·         Add oats and stir, toasting until they smell nutty, 1-2 minutes.
·         Add 2 cups of liquid; bring to a boil.
·         Lower heat and add vegetables or meat, salt, and pepper. Simmer uncovered for 10-15 minutes, stirring occasionally, until oats are desired consistency. Add more liquid if necessary.
·         Taste and adjust seasonings. Garnish with a drizzle of olive oil.

*This is an infinitely flexible dish, but I've included the recipe above in case you wanted some guidelines. Use it as a starting point, but make the dish your own!